How to Spot the Best Spotting Scope for Hunting

Man peering through the straight eyepiece of a Meopta MeoPro spotting scope.
Meopta's MeoPro 80 HD straight eyepiece spotting scope
is an fine example of a bright, sharp, zoom telescope for hunters, birders, and any outdoors viewing. This is one of my favorite South African PHs, Geoffrey Wayland of
trying to find me a big kudu. He found a big eland instead.
You don't NEED the best spotting scope for hunting, but one can be quite helpful. I find one of these 15X to 60X telescopes essential for accurately judging trophy quality. But even when I don't care about that last inch of antler or horn, a spotter helps me find game as far away as five miles. It's almost a magic wand for scouting. But only if it has the right stuff. We'll list and describe what's right and why in this report.
How to Use Your Best Spotting Scope
Before digging into the technology of spotting scopes, let me give you a quick outline on how I use one. When hunting or scouting I find a high perch looking over suitable game habitat. First I scan for anything obvious with my naked eyes. Then I scan methodically with a binocular, stopping now and then for another naked eye search, just in case something has popped into view close. Then back to the binocular. Once I've located a prospective animal, I mark its position with distinctive landmarks like trees, boulders, etc. Then I quickly switch to the spotting scope mounted on a tripod. At its lowest power I "eyeball aim" it toward the spot, find the landmarks, and frame my subject in the center. Only then do I turn up the power to maximize the view, tweaking focus as necessary. Depending on atmospheric conditions I might see detail most clearly at 40X or 30X or, sometimes, 60X.

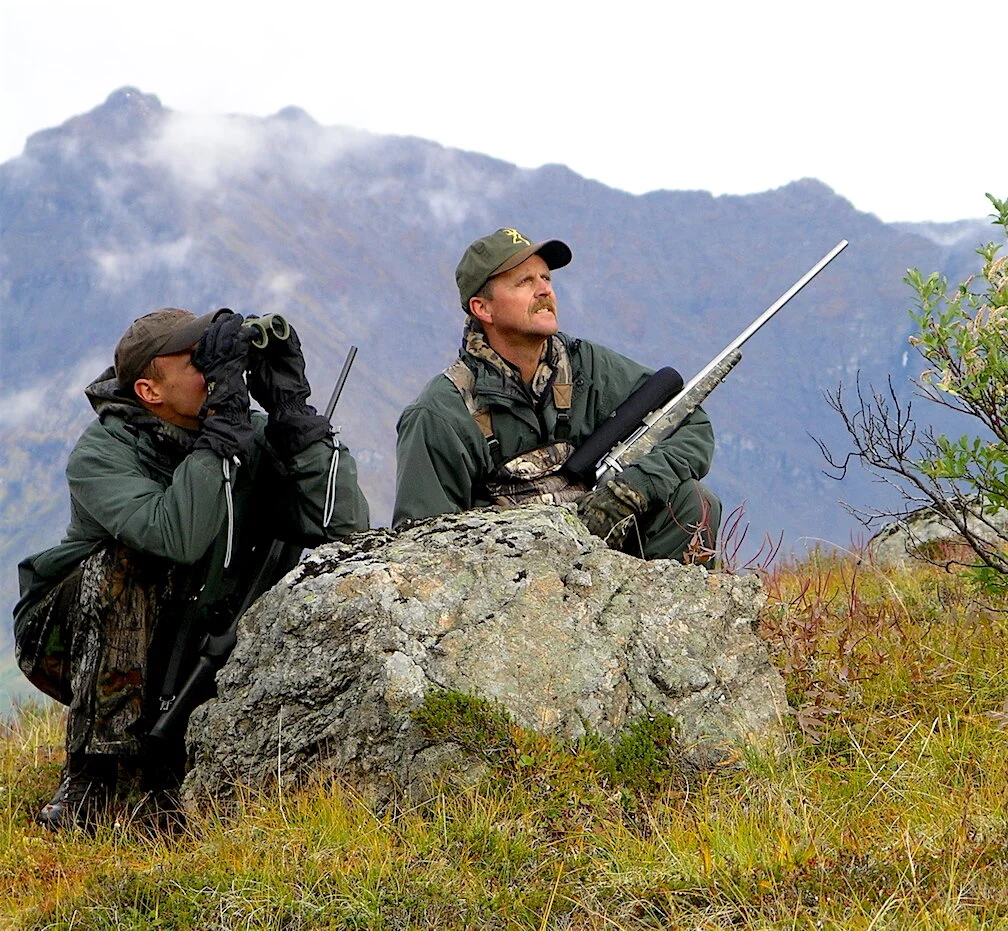
Photos shows two hunters glassing for game, one with binocular, the other with spotting scope.
A smart team approach to finding game is to put one hunter behind a spotting scope for the far view while another scans for closer game with a binocular.
If I find no game, I'll begin studying more distant terrain and habitat. I can take in great sweeps of country at 20X or higher. Over the years friends, guides, and I have found game miles away. We've identified many as worth the hike from that far, too. Master sheep guide Lance Kronberger once determined via a 60X Nikon scope that a Dall's ram roughly five miles away was full curl. At those distances it takes crisp, clean air plus a lot of watching and studying to determine horn and antler size, but this sure beats climbing several thousand feet and hiking three to ten miles on a hope and a prayer.
Astronomically Revealing
A good spotting scope will be effective until perhaps 30 minutes after sunset -- unless you focus it on Jupiter, Saturn, the moon, and other celestial bodies. Then it's good all night. At 60X you can see Saturn's rings, Jupiter's Great Red Spot, and often its four Galilean moons. But you're probably more interested in rings around ram horns and tines on antlers, so let's next look into what makes a spotting scope effective for viewing terrestrial objects.

Photo shows a large, full moon as seen through a spotting scope.
A spotting scope is perfect for close-up views of the moon, Jupiter, Saturn, distant rafts of ducks, shorebirds -- pretty much anything you want to see enlarged.
As you know, the best spotting scopes are expensive. You don't want to waste your money on useless features, so it pays to understand what contributes to stellar performance. Think of a spotting scope as one barrel of a binocular, but with much higher magnification. This means most ingredients in a good binocular are needed in a good spotting scope, too, with just a couple of twists we'll describe below.
Best Spotting Scope Ingredients
First, you want a large objective lens on a spotter because, like binoculars and rifle scopes, the objective diameter divided by power gives you the Exit Pupil, that little circle of light you can see in an eyepiece held at arm's length. This must match the diameter of your own pupil to maximize light reaching your retina. If EP is smaller than your pupil, the image appears dimmer. If EP is larger than your eye, the excess rim of light just bounces off your iris and you gain nothing except more leeway for shifting your eye side-to-side and back-and-forth behind the eyepiece before you see edge blackout. Which is no small thing.

Photo shows objective lenses of spotting scopes, 65mm, 85mm, and 95mm
The larger the objective lens, the more light a spotting scope can take in. Shown here are a 65mm. 85mm, and 95mm. All are interchangeable parts of Swarovski's ATX/STX modular sytem.
Exit pupil diameter in spotting scopes changes with the power of the zoom eyepiece. At 20X, a 60mm objective lens would yield a 3mm EP. That's not an overly large EP. In full daylight the human pupil shrinks to about 2.5mm, so a 3mm EP will provide all the brightness your eye can possibly take in. But dial the power up to 30X and EP shrinks down to 2mm. Now you're seeing things a trifle dimmer than they really are, but still easy enough to see. At 60X, however, EP is just 1mm. Quite a dark image, but, amazingly, you can still see it with remarkable detail.
To get a brighter view, you can step up to an 80mm objective. At 20X it will give you a 4mm EP. At 40X it will be down to 2mm. But at 60X it's just a 1.33mm. There are some spotters with 90mm and 100mm objectives. That seems like a big deal and it sort of is, but 95mm divided by 60X still leaves you with a less than 1.6mm EP.
Brightening Those Small Exit Pupils

Image shows image pupil circle of light in an eyepiece.
The exit pupil in a scope's eyepiece relates to your own pupil. It it's as large or larger in diameter than your pupil, it's providing all the light your eye can take in. An overly large EP provides more room for head and eye shifting before you see the edge blackout.
Does this mean you're condemned to looking through a glass darkly? Not if you get the rest of the spotting scope's features right. Remember the anti-reflection coatings that maximize light transmission through a binocular? Same thing applies to a spotting scope. You want a spotting scope with all air-to-glass lens surfaces multi-coated. This is usually advertised as "fully multi-coated." These coatings maximize light "throughput" via destructive interference wave cancellation easier appreciated than explained.
ED Glass Essential in Best Spotting Scope
In addition to these coatings, your spotting scope should include an ED (Extra Low Dispersion) or HD (High Definition) lens made of fluorite crystals. ED and HD are marketing terms without specific definitions, so make sure they actually reference a fluorite lens because such a lens is critical for minimizing color fringing. Color fringing rears its fuzzy head as a halo of purple, yellow, or red color around the fringes of objects, especially those contrasting strongly with the background like elk antlers against the sky. Color fringing becomes distracting at about 20X and grows worse with any increase in magnification. Nip it in the bud with ED glass.

Image shows hunter looking down into angled eyepiece of a best spotting scope with integral sunshade.
You can't detect ED glass from the outside, but you'll notice it in the sharper view. This photo demonstrates the comfortable position an observer can assume while looking into an angled eyepiece, which also lets you keep a tripod lower to the ground for more stability and less vibration in winds. Note also the integral sunshade/lens hood pulled forward to keep rain and direct sunlight off the objective lens of this
Finally, notice the large, knurled focusing collar beside the similar power-adjusting collar on the main barrel just ahead of the bend/bulge where the Porro prism is located. These need to turn smoothly and evenly for fine focus adjustments. The small, grooved button just above my index finger is the lock/release for the rotating collar or yoke that lets you spin the scope body, turning the eyepiece for easy viewing by anyone beside you chanting the usual "Can I look? Can I see? Let me have a look!"
Most, if not all, spotting scopes use a Porro prism to correct the upside down and backward image projected through the objective lens. The Porro prism is positioned in the bend or bump in front of the eyepiece. It is better than a roof prism because Porros do not require a reflecting mirror, which always loses some light. A Porro does not require phase coating nor more expensive BaK4 glass for maximum resolution, either. Its only drawback in a telescope is that bulky bend or bulge in the tube.
These, then, are the "parts" that make a spotting scope sharp and bright: fully multi-coated lenses, large objective lens, and ED (fluorite) glass. You can shop for external lens coatings that minimize scratching and resist water and oils for convenience and increased durability, too. Most brands add these just to remain competitive. The impressive thing about a high-quality spotting scope with all these ingredients is how well you can see at low light through even small EP diameters. I'm usually using my spotting scope well after sunset and well before sunrise.

Hunters silhouetted against dawn sky, glassing.
A spotting scope does not transmit a bright image at dusk and dawn, but bright enough to find game.
Choose An Angle on Convenience
Another important consideration is the angle of the eyepiece. It can be straight or angled about 45-degrees. Straight is easier to aim at the subject accurately and more comfortable to use from a car window mount. A straight eyepiece is easier to use with a camera for digi-scoping, too. An angled eyepiece takes some getting used to because you look 45-degrees away from your subject. But once you have it locked in, you can sit or stand with your head/neck in a comfortable position looking down into the view. And if someone else wants to see, you don't have to get up. Just loosen the rotating barrel collar (a wonderful convenience with an angled viewfinder) and spin the eyepiece to the side where your partner can get the view. The scope's axis remains on target. If you want to get really sneaky, poke the scope over a boulder or some brush, lie down and look up into the angled eyepiece. You can watch a bedded deer for hours like this.

Photo shows hunter glassing rthrough straight eyepiece spotting scope on car window mount.
One of my favorite Canadian guides, Andre' van Hilten of
shows why the straight eyepiece is nicely suited to glassing from a vehicle. You roll the window to reach a comfortable viewing level. With an angled eyepiece you often end up cramming your head into the top of the cab or leaning uncomfortably to see into the eyepiece. Notice the padded jacket around this scope. Good protection against knocks and scratches, even though most scopes come already wearing an armored coat.

Hunting guide lying on ground looks up into the angled eyepiece of a spotting scope while hiding behind a boulder.
And here one of my favorite Alaska guides,
demonstrates the magic of an angled eyepiece. Peeking over a boulder.
You may notice that some scopes focus via a collar on the barrel, others with a small knob projecting above the main barrel just in front of the Porro prism housing. Many find the latter type easier to tweak precisely without moving the scope's position. Try a few to see what you like.
How to Compromise Size and Weight
Bulk and weight will be an issue in the field. It's always a compromise. The more you climb and hike, the less bulk and weight you want. But when you need to sort out an elk herd a mile away at dusk, you want the biggest objective you can get. Spotters come with objective diameters from 50mm to 100mm. Most of us settle for the 80- to 85mm compromise. Anyone glassing from or near a vehicle might want the 95- 100mm objective. Serious backpack hunters usually go with the 60- to 65mm objectives.

Swarovski's ATX modular system is a best spotting scope that interchanges thee objective lens barrels onto angled or straight eyepieces.
Swarovski's modular ATX system includes o
bjective lens/barrels of 65mm, 85mm, and 95mm
that can be rotated off and on either an angled or straight eyepiece. Choose the 65mm for backpacking, the 95mm for working near a vehicle. The item at lower left is a camera adapter for digi-scoping.
Pay some attention to little things like sunshades/lens hoods. Those that are integral and pull or twist out are best because you won't lose them. Eyepiece caps are problematic. Most slip on and off too easily. I wish more came with a clamp-on or screw on cap. An acceptable option is a complete neoprene jacket. These protect against bumps and scratches as well as dust and rain, although most good scopes are guaranteed dust and waterproof. I don't like the bulk of neoprene jackets flapping in the wind or the time required to open them, but the hassle may be worth it.
Finally, you'll need a solid tripod that adjusts to a comfortable standing height. You can get by with a kneeling/sitting height, but sometimes you don't want to sit on the cold ground and sometimes you have brush you can't see over. Bean bags work well on vehicle hoods and windows.

Photo shows man peering through straight eyepiece Zeiss spotting scope with small focusing knob.
My friend and sometimes hunting partner Joseph von Benedikt demonstrates the ease of a straight eyepiece from a standing tripod. This
uses the small focusing knob atop the main barrel just in front of the prism housing.
I truly enjoy using binoculars and spotting scopes when scouting and hunting. They not only help me find more game, but let me see things I wouldn't otherwise see — like the red fox and golden eagle sparring over a dead carcass on the far side of the mountain valley. And that raft of bluebills bobbing off a distant point. And a beard hanging off the breast of a turkey silhouetted in a cottonwood tree at dusk. And the license plate of a vehicle trespassing on my neighbor's bean field. And...
Features of Best Spotting Scopes
Fully multi-coated lenses
Large objective lens
Fluorite glass (ED or HD)
Zoom eyepiece
Rotating collar (with angled eyepiece or camera attached)
Integral hood
Scratch and oil resistant exterior lens coatings
Rubber armor exterior
Straight or angled eyepiece (your choice)
Water, fog, dust-proof guarantee

Hunter with spotting scope used to find the big 10 point whitetail he's posing with.
Yes, spotting scopes are for whitetail hunting, too. Spomer found this 10-point Kansas buck feeding in a green wheat field three miles from his perch. He raced over just in time to catch the buck on the edge of rive bottom timber. And yes, that Browning A-Bolt Titanium (superseded by the
) in 270 WSM is fully unloaded, doubled checked and safe, safe, safe.
Ron Spomer's eyes were opened to the value of a spotting scope when his brother bought a little Bushnell Trophy in the early 1970s. He's since enjoyed the views through Swarovski, Leica, Meopta, Sig Sauer, Leupold, Nikon, Vortex, Pentax, Celestron, Zeiss, and additional Bushnell scopes.