Zero Your Rifle With One Shot!
I’ll bet you, like me, have seen or heard someone at a shooting range wasting a box of ammo while trying to sight-in. Even two boxes. And then leaving in disgust.
Or maybe that was you. Or me.
Who wants to waste this many rounds zeroing a rifle? Do it right and you’ll need as few as… ONE!
Yeah, most of us have endured some painfully unsuccessful zeroing sessions. They were expensive wastes of time and resources then, but intolerable at today’s ammo prices and scarcity. Burn 20 rounds zeroing and you might have none left for hunting.
So why don’t we examine some zeroing steps that save ammo. Right now. If we do this right, we could get zeroed with just one shot. Yup. One shot.
Step 1. Solid Rifle Supports.

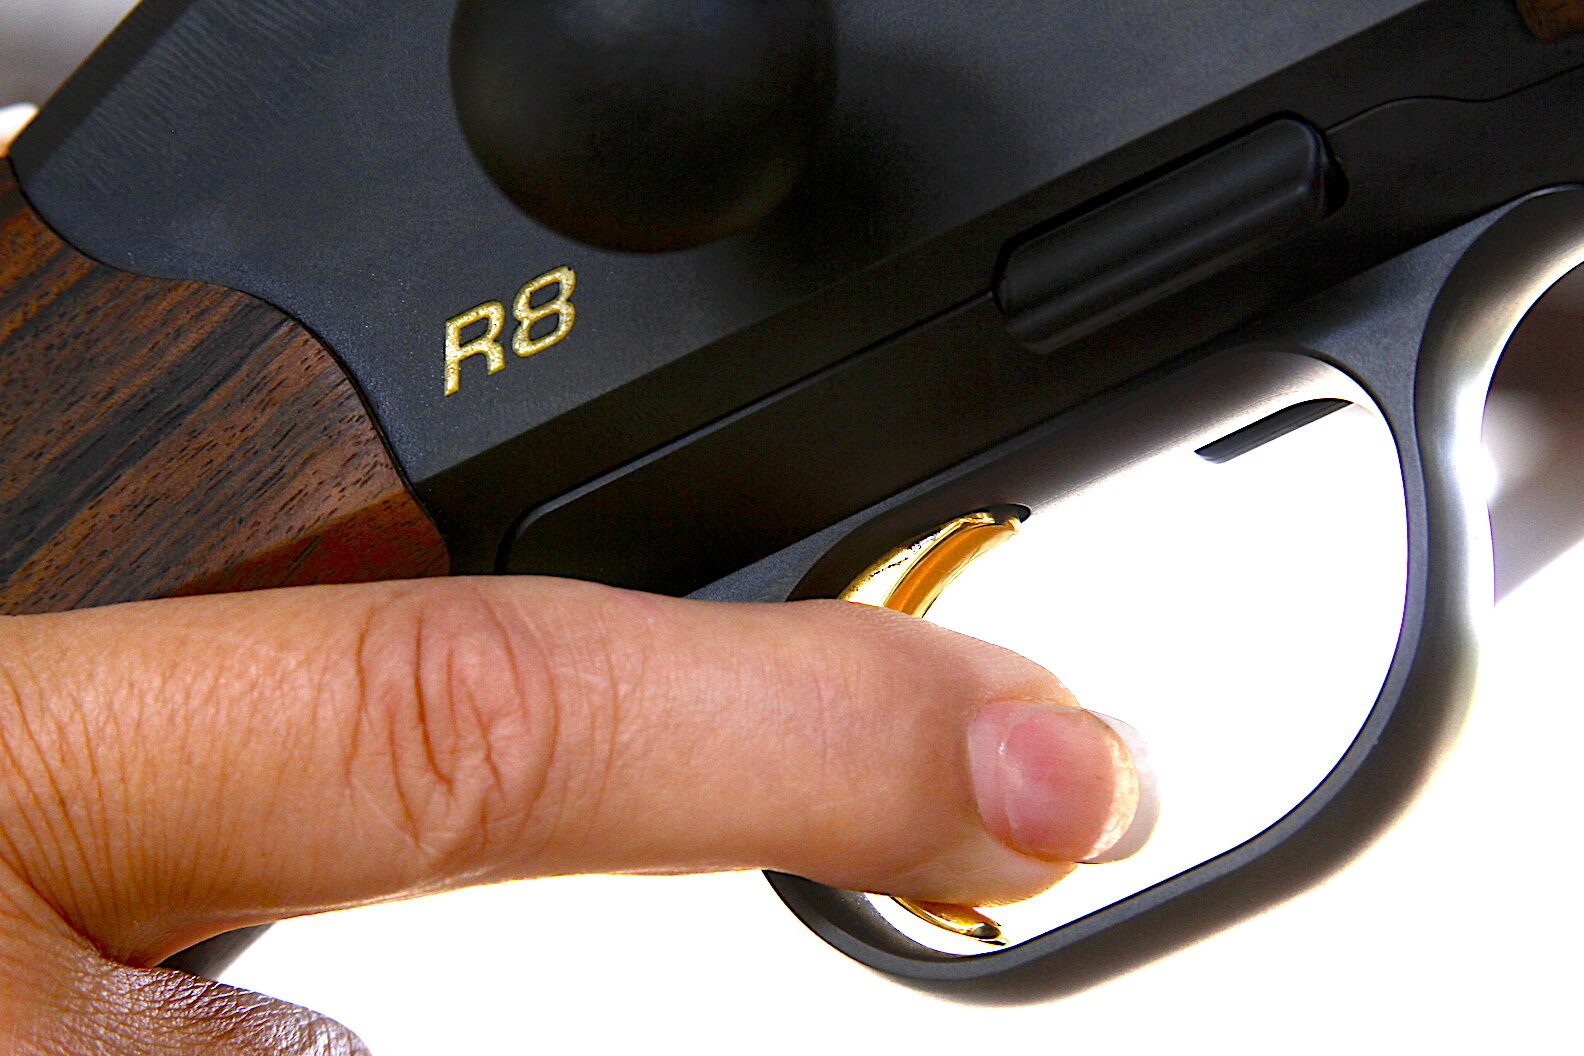
A proper platform for zeroing eliminates as much chance for disturbing the rifle as possible. Here I am anchored to a padded stool, both feet on the ground, Kimber Subalpine 280 AI resting on a fair-sized bench tripod, bunny ear rear bag under the stock (can’t be seen) and all atop the rock steady, three-legged Stuckey Bench against which I am also leaning. The gray unit with the paper roll is an Oehler Research 35P chronograph. The English setter sneaking into my lap is not a required or even recommended accoutrement. She was removed to the truck before firing.

Skip the wobbly card tables and wind-blown truck hoods. Either go prone with a solid bipod or set up on a rock-solid bench top with sandbags and/or a table-top tripod rest. Heck, use a Lead Sled if it settles things down and eliminates flinching. Support the butt as well as the fore-end. The less the gun wiggles and vibrates the better.
Now settle yourself. Use a stool or chair of proper stability and height. Press both feet on the ground and your chest into the curve of the benchtop (if it’s solid.) This will dampen your shakes and heartbeat.
Step 2. Dry Fire Test
Pulling the trigger on an empty chamber is an ammunition-saving tactic for checking all aspects of your zeroing set up: trigger control and follow through, target acquisition and concentration, steadiness of platform and rifle throughout the ignition process, etc. — all without wasting a single cartridge.
Now this might sound weird, but it’s really magical. Dry fire. Yup. Set everything as solidly as you can, sight on the bullseye, concentrate on keeping the reticle steady, and pull straight back on the trigger with the first pad of your trigger finger. Be conscious of that trigger pull. Are you pulling toward your palm or pushing slightly outward? These subtle moves can nudge your shots off. Think “straight back.” And then hold it back after the striker falls. Do not snap your finger forward. Bad form like that can lead to flinching. Follow through.
Do this dry firing several times until you perfect that trigger pull and follow through. But then indulge more dry firing while concentrating on the sights in relation to the target. Keep both eyes open through the “shot.” Imagine watching the bullet sail to your point of aim. Do this right and you should see and be able to announce where the crosshair was or was moving when the shot broke. “I pulled slightly left. I nudged that one down.” Training to do this pays dividends in the field where you’ll have a much better idea if your shot was on the shoulder or pulled forward into the neck or back into the paunch. You might also advance to live firing with a 22 rimfire in order to perfect these actions.
Step 3. Bore Sight

There are several bore sighters on the market, but with a bolt-action rifle you can just remove the bolt, center the bullseye in the bore, then turn the scope until the reticle hovers over the same bullseye.

Once you’re dry firing and calling your shots to good effect, you can transition to real ammo, but in order to not waste it, let’s bore sight first.
Bore sighting is merely a method of moving your sight to point where your barrel puts its bullets. It can be done with commercial lasers or the old arbor and grid systems or by removing your rifle’s bolt and sighting down the barrel itself. Yes. Easy. Just set up the rifle on your shooting platform and align the barrel so that the bullseye at about 30 yards is centered in the bore as you look through it from behind the butt stock. (Most modern cartridges put their bullets on line-of-sight at 30 yards.) This done, look through your scope to see if the reticle is over the same bull. If not, crank the turrets and watch the reticle move until it’s over the bull. Obviously you must keep the rifle rock steady through all this, so if you can’t lay heavy bags over it, have a friend hold it down while you turn the scope. Double check bull-in-bore and bull-under-reticle until the two line up. You’ll then be bore sighted. But still not ready for live fire.
Step 4. Gear Check

Most scope rings should be tightened at 18- to 22- inch pounds, but if you don’t have a torque driver, just use thumb and two fingers on your screwdriver. A thin swipe of silicone inside the rings can aid in maintaining grip.
A frequent cause of zero frustration is a loose scope or rifle stock. To circumvent this mess, check bases and rings holding your scope. This is hard to do because a tiny bit of movement of the base that you might not detect can mess up accuracy, but getting a torque wrench atop these screws requires removing the rings, and who wants to do that? So, do your best to detect base wiggle and keep it in mind of issues arise later.
Checking ring grip is much easier. Most ring screws should be torqued 18- to perhaps 22 inch-pounds. If you don’t have a torque driver, a thumb and two-finger grip on a screwdriver should produce close to that. Just don’t over-torque and strip the screw. By the way, a neat trick for assuring good scope grip is to apply a thin layer of silicone rubber inside the rings when mounting the scope.
With the scope secure, check stock bedding screws. The action screw forward of the magazine well is the most critical. Torque it to at least 25 inch-pounds, more if you know your gun builder calls for it. Some go as high as 65 inch-pounds. About 30 to 45 inch -pounds are a reasonable average. Or just tighten until it feels about right.
For the rear or tang action screw, it’s often wise to tighten just snug. Crank with too much pressure and you might bend the action if it’t not properly bedded to the stock. Pillar and aluminum block bedding systems generally prevent or correct this.
Your final gun check might be to slide a half sheet of typing paper between the barrel and stock channel to discover any inconsistent contact points. Stocks are usually floating all the way back to the chamber or even front action ring, pressure tip bedded, or full-length bedded. All can work, but you don’t want a stock touching on one side and not the other or touching erratically.
Step 5. Live Fire

With you, your support, and your rifle/scope ready, it’s time to put a hole in paper. You can do it at about 30 yards or 100 yards. Do 30 if you’re not real confident in your bore sighting. I like a foot-square paper on a clean 3-foot square or larger cardboard backer at 100 yards. This catches any really wild, off-line shots.
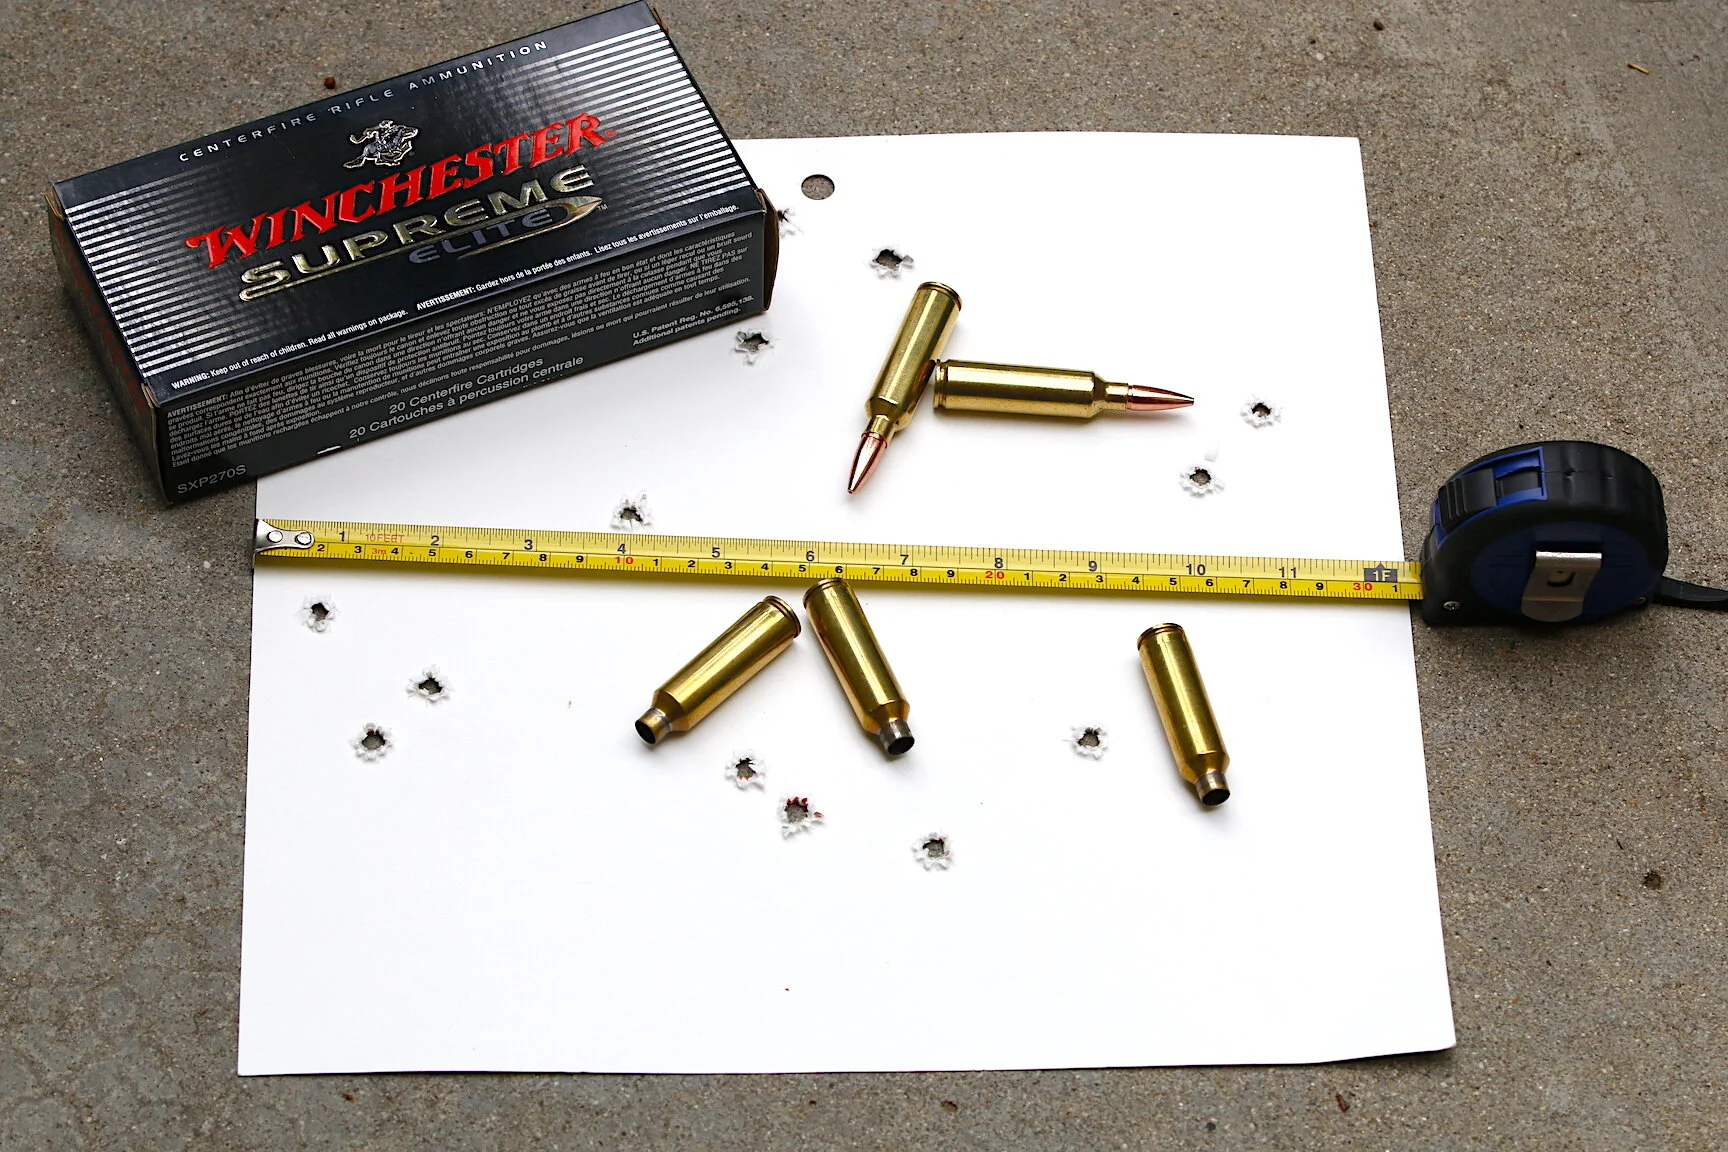
The backside of this 12” target clearly shows why a large area can be important for capturing wildly divergent hits. The zeroing system outlined in this article should prevent cartridge waste as shown here.
Get solid and ease off a precise shot, just as you did when dry firing. Note where the hole appeared on target. The position is where your barrel is throwing your bullets, so all you have to do is adjust your scope to look at the same spot. Do this by locking the rifle back on your original bullseye sighting point so that it can’t move. Then look through your scope and turn the windage and elevation adjustment dials until the reticle centers over that bullet hole. BINGO! Scope and barrel are now looking at the same spot. And you’ve fired only one shot. If you did this at 100 yards, you are zeroed dead-on at 100 yards! If you did this at 30 yards, you’ll likely shoot 3 to 6 inches high at 100 yards, so you’ll need to shoot another round at 100 to verify. To reiterate, after you shoot, just lock in on the same sight picture (same aiming point) and turn the turret dials until the crosshair covers the bullet hole.
Step 6. Double Check and Set Hunting Zero
If you’re truly hard up for ammo this one-shot zero might be sufficient, but I, personally, like a bit more reassuring confirmation than that. So after moving my crosshair to cover my first bullet hole, I’ll fire a second. Often it’s an inch or two out. I probably moved the rifle while turning the turrets. If I have plenty of ammo and a new rifle, I’ll do the classic three-shot test and find the center of the group, but if an old rifle I know and trust, there’s no need.
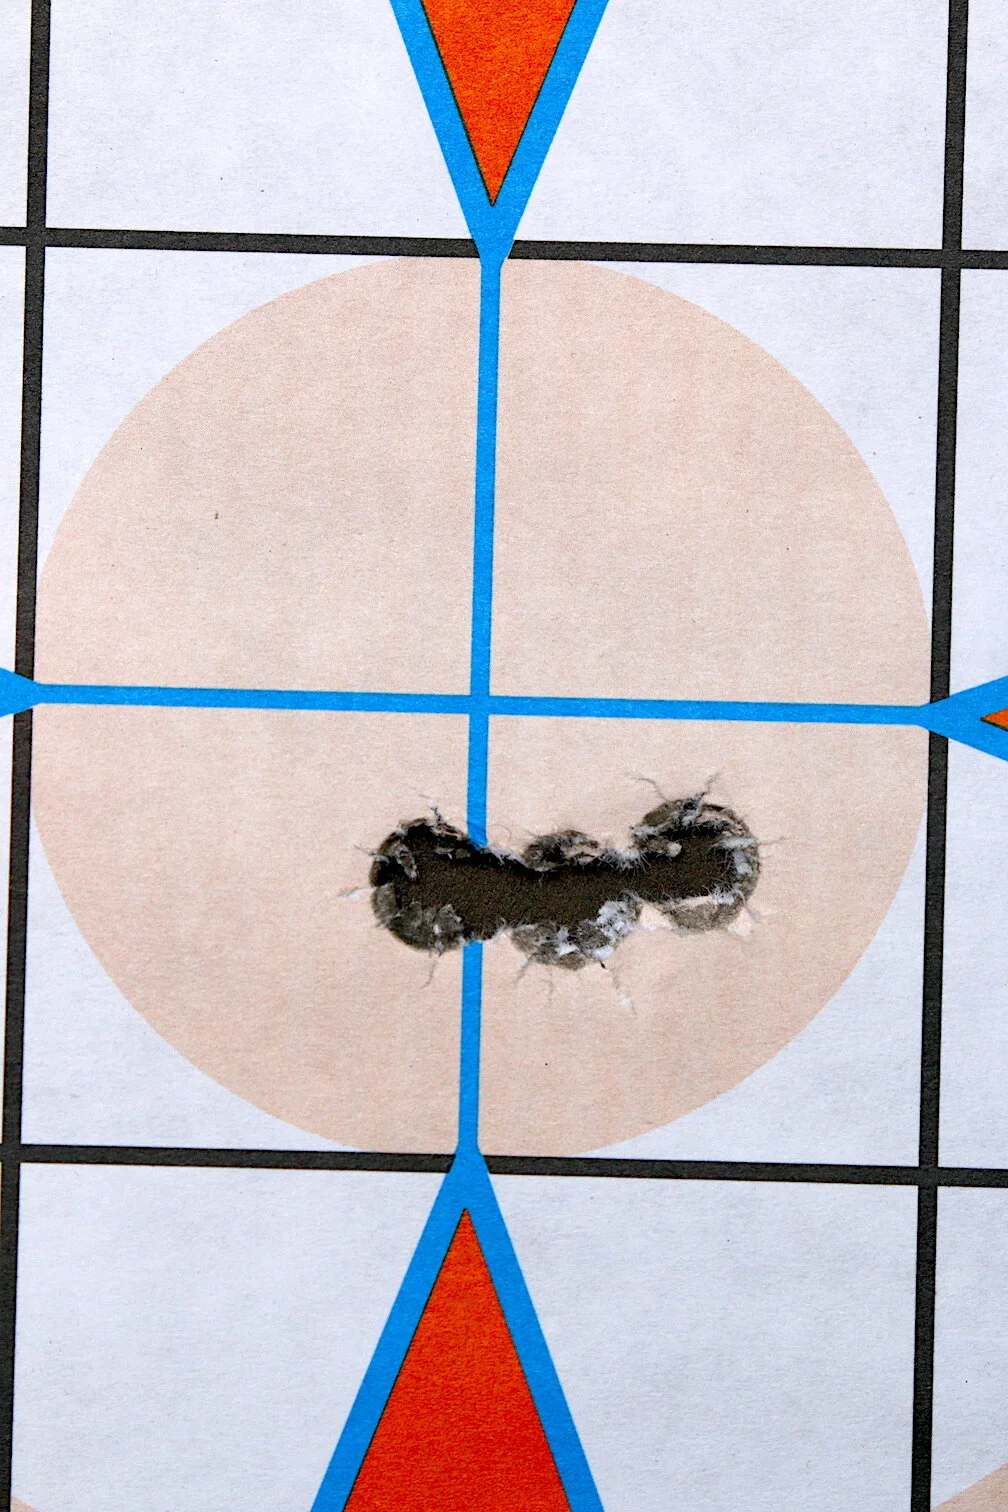
Your hunting zero needn’t be dead-on at 100 yards. Consult ballistic tables and trajectory charts to determine how high you should hit at 100 yards in order to maximize your point blank range. If you’re flush with ammo and really want reassurance, punch a final 3-shot group. One like this will give you all the confidence you need! By the way, my aiming point for this group was about 3 inches below the bullet holes.
My next objective is to set my hunting zero, which is almost never dead-on at 100 yards. With bottlenecked cartridges from 308 Winchester through the traditional magnums its more often 2.5 to 3 inches high at a 100 yards. This translates, depending on bullet B.C. and Muzzle Velocity, to dead-on at anywhere from 240 yards to 320 yards. This means my maximum ordinate (peak height of trajectory) will be no more than 4 inches high at about 150 to 180 yards and no more than 4 inches low until 290 to 350 yards depending, again, on B.C. and MV.
To save more ammo in the search for this maximum point blank range setting, consult a ballistic calculator. There are many free ones online, most of which will calculate MPBR for you. If not, start with a 250-yard zero, run the calculator, study the resulting trajectory chart, and change to closer or farther zero distances until you find the optimum trajectory curve for your needs.
Let’s say your ballistics search indicates you should hit 3 inches high at 100 yards. Your rifle is already zeroed via the one or two shots you’ve fired for 100 yards, so now all you need do is ink a small bullseye 3 inches below the target’s bullseye, return to the bench, align the scope on the original bull, lock down the rifle, and turn the elevation turret until the reticle sits over the 3-inch low dot. The barrel should then be pointing and throwing bullets 3 inches above your sight.
If some of this seems unclear, please re-read and think through it all. Eventually it should come into focus. If not, just get out and follow the steps. I’m betting — even if you mess something up — you’ll achieve zero a lot sooner than you might have with your old systems.
Step 7. Understanding What Can Go Wrong with the Click Dialing System
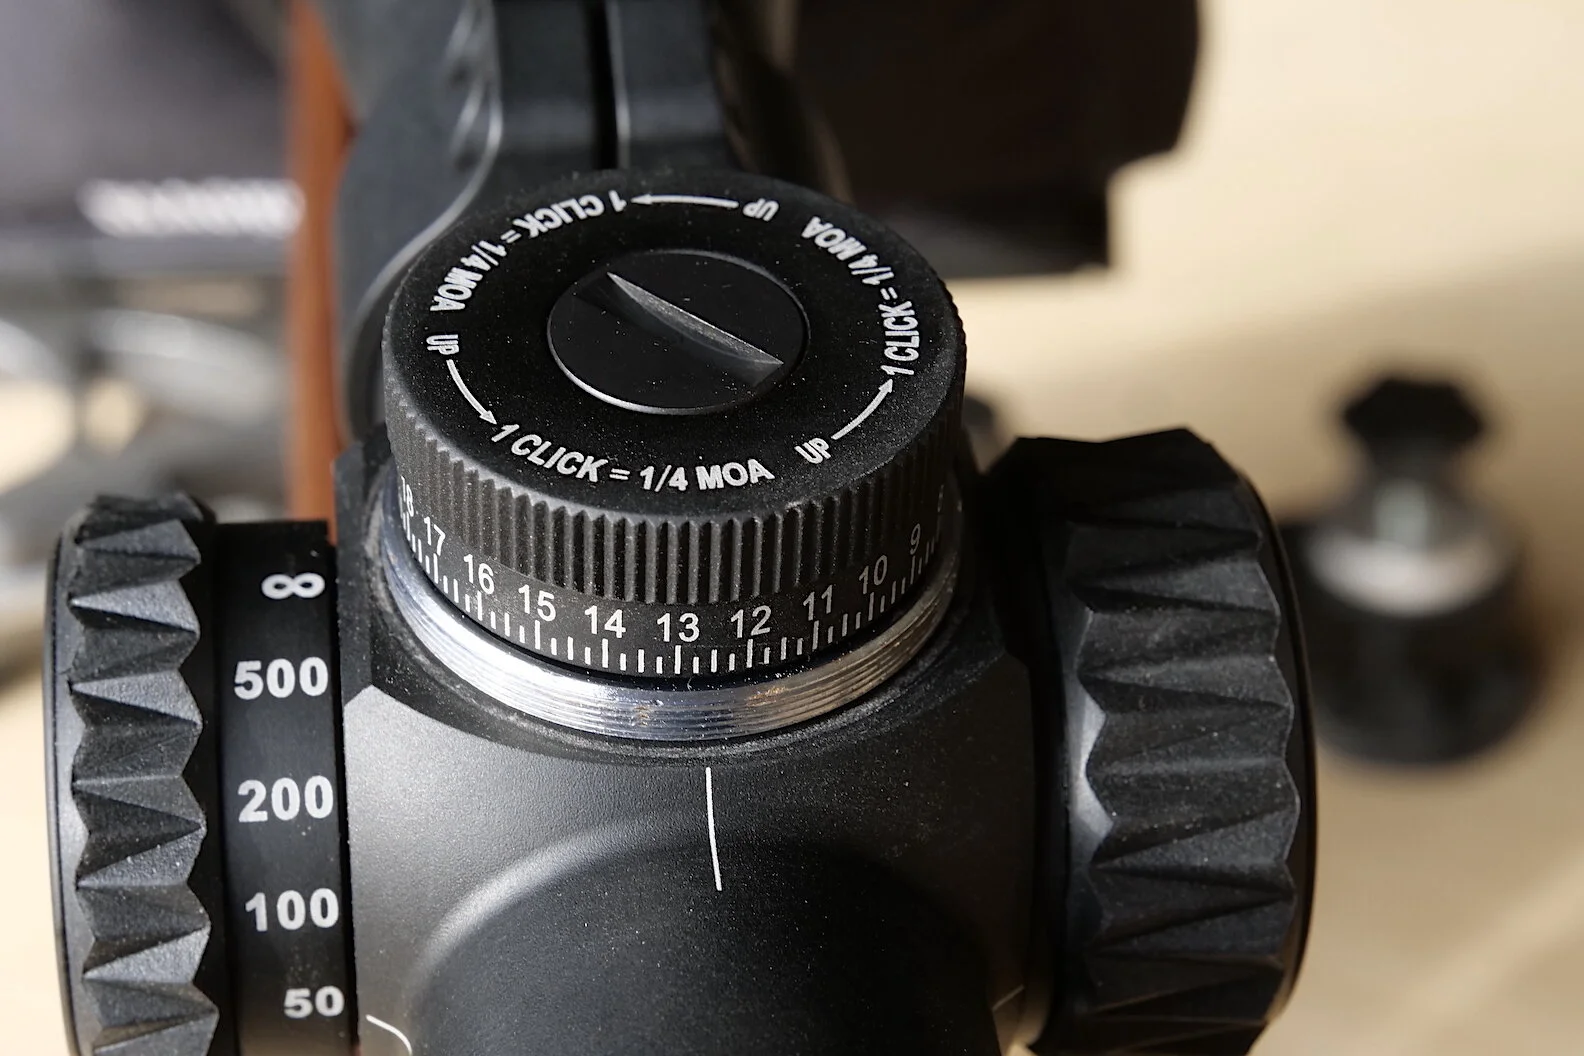
Click dialing usually works, but is sometimes compromised by inaccurate movements and sticking erector tubes. Heck, sometimes you simply miscount the clicks.
If you’ve been zeroing with the traditional click dial system and having trouble, it might be due to subtle internal scope problems. Click dialing involves moving a scope’s internal erector tube to adjust the target image in relation to the reticle. This requires precise and consistent movements with each tactile and audible click of the scope turrets. They aren’t always precise and consistent.
So, if your scope is supposed to adjust 1/4 inch at 100 yards (which is the same a one-quarter MOA) but the turret really moves things 1/3 or 2/3 inch, you can get lost pretty quickly.
Another problem can be a sticky erector tube. The turrets press a post or screw tip against an internal tube to move it in relation to the reticle. Springs press the tube back agaibst the turret posts. Dialing doesn’t move the reticle over the target, but the image of the target over the reticle. Regardless, this works to zero your rifle so long as the parts perform properly. They don’t always.
What sometimes happens is the turret tip wears and galls the erector tube until the connection “sticks.” Recoil from shot after shot vibrates the two parts “together.” When you click a few adjustments, the pressure of the turret post against the erector might not be enough break it lose. The result is your next shot goes to the same place as your previous one. Seeing this, you guess your turret adjustments didn’t move as much as they were supposed to, so you crank then in again. But the recoil of your second shot probably jarred the stuck parts loose, resulting in your third shot landing twice as far as you thought you’d just adjusted it.
This phenomenon is part of the reason why your’ advised to shoot three shots, find the center of that group, and then make your adjustment. That’s fine when you have plenty of ammo, but during times of shortage, dialing and watching your turret move seems the smarter approach.
By the way, two techniques for avoiding the stuck erector tube issue include tap the turret top with a screwdriver handle in order to jar it loose after your adjustment or dialing a complete revolution and coming back before making your actual adjustment. The tension of a complete revolution of the turret often introduces enough tension to break the sticky connection.

Do things right and three shots should be more than enough to zero your rifle.